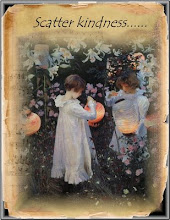
Here is a tutorial for all who are new to crazy quilting or who have not tried to print up a silkie before.
Items that you would need:
Computer
Printer
silk or cotton printer fabric
Images that you would want to incorporate in your project
Here is a picture of some clip art that I found on a wonderful blog called The Rustic Victorian. Here is the link to check out this blog site:
http://tinyurl.com/dm8rlw I am going to use these images for some silkies.

Here is a picture of the silk printer fabric that I use for my silkies. It comes in sheet form. It is the size of standard printer paper. Printer fabric also comes in cotton and on rolls. There is also many different brands. This is just the one that I use. Great for any project.

After I have the images that I would like to print and the printer fabric, I am able to start making my silkies. You do not have to have my exact printer. My printer is a Mothers Day gift from my darling husband. It is an HP copier/scanner/printer. All you would need is a printer and you computer, for your silkies.

Before I print on my printer fabric, I send a plain piece of copy paper through my printer to make sure that I have the exact size that I want the silkies to be and to check on the colored ink.
The thing to remember about printer fabric is it uses a lot of ink. That is why I think the test paper is important. Plus you don't "waste" your printer fabric. I also adjust the ink to make the silkies darker after the test paper. That is if it needs to be adjusted. All printers are different and you would need to follow their instructions for color adjustment.

After everything is to your liking it is time to print out your silkies. When you are done you will have great fabric for your project.
Here is a suggestion for those "test" papers that you send through your printer. You can use them in you multi media projects. I purchase card stock and make Victorian cards by gluing the images to the front!
Now for the best part of this post. I will have a drawing to give away the four silkies that I just printed up. Please, leave a comment to this post including your email address and I will draw a name out of a hat for one of the four silkies. So I will have four winners with one silkie each.
TTFN
 Here is a picture of the silk printer fabric that I use for my silkies. It comes in sheet form. It is the size of standard printer paper. Printer fabric also comes in cotton and on rolls. There is also many different brands. This is just the one that I use. Great for any project.
 After I have the images that I would like to print and the printer fabric, I am able to start making my silkies. You do not have to have my exact printer. My printer is a Mothers Day gift from my darling husband. It is an HP copier/scanner/printer. All you would need is a printer and you computer, for your silkies.
 After everything is to your liking it is time to print out your silkies. When you are done you will have great fabric for your project.


13 comments:
Thank you, thank you..I really appreciate this tutorial...hugs, Skye
Me too! I appreciate it very much also! :)
Your silkies are gorgeous! Cwkalina@aol.com
This was a nice tutorial. Thanks for making the whole process less intimidating. I love the idea for using up the paper test pages too. Please enter my name in your drawing. I would love any one of these beauties.
Great tutorial. Now I can put some of this to use when I run silkies for my mom. I would appreciate any of these. Thank you for the opportunity
thank you for your tutorial is very helpful! I have a new printer waiting to try your method!
Great post. Especially about the test page! Last time I printed my 'cottonies' were too large and I had to do it again. Great tip!! Ruby
Lyn, Thanks so much for making this tutorial. One of these days I will try it and see if I am up to the challenge! I appreciate it!
Susan
Well done Lyn! Great tutorial! I've printed on muslin before but never thought to run a test run on paper, doh! Now I have the nerve to try actual silk or other fancy fabrics too. Thanks so much for taking the time to teach us!
Love the silkies you made up too!
Hugs, Di
Thanks for the tutorial, great advice and I love your silkies.
Please may I be entered in the draw if not too late?
They are beautiful.
And thank you for the links etc.
Hugs Pam UK
Hello Lyn I love the new look of your blog. It is truly lovely. Thanks for the information on how to do silkies. These silkies are very pretty. I would love to have one. Hugs Judy
Great tutorial Lyn! Am I too late to put my name in for the draw?
Hugs,
Kerry
Post a Comment